Watches I own or have owned...
Beginners Gimp! - Opening, layers and using the repair tool to remove dust...
by , 18th December 2012 at 15:38 (14217 Views)
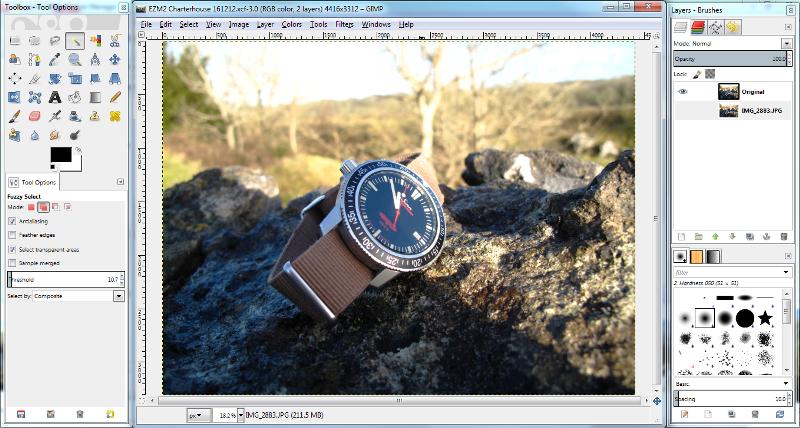
For reference, this is the original photo:
Opening an image in Gimp and creating a layer for editing.
Once you have downloaded Gimp, open it and drag in the photo you wish to edit. This creates a ‘layer’ within Gimp comprising the photo. The ‘Layers’ dialogue box is found on the right of the screen and is selected using the appropriate tab at the top.
A little on layers and controlling them:
‘Layers’ are just that and act like overlaying pieces of paper on top of each other. The ‘visibility’ of a layer is controlled by clicking to the left of each layer – when a layer is visible it has a small eye symbol shown, when the layer is off the eye is not shown.
The order that they appear in the dialogue box determines the order that they are displayed – if you have a full size layer visible at the top of the list, you cannot see the lower layers though it. You must select the layer you want to work on by clicking on it – the selected layer is highlighted in blue, then remains highlighted in grey.
One of the main mistakes I found myself making initially was not having the layer I wanted to edit selected and wondering why my changes were not being made – they were, but hidden. **Even if the selected layer is not visible, or is covered by another visible layer, it is the layer that will be affected by changes you are making…**
Layers can have various things done to them, such as making them ‘fade’ by altering the ‘opacity’ level using the slider at the top etc, more on that in a later blog entry.
A new layer can be created or a layer can be duplicated or deleted using the icons below the layer list and the display order can be changed using the up and down arrows.
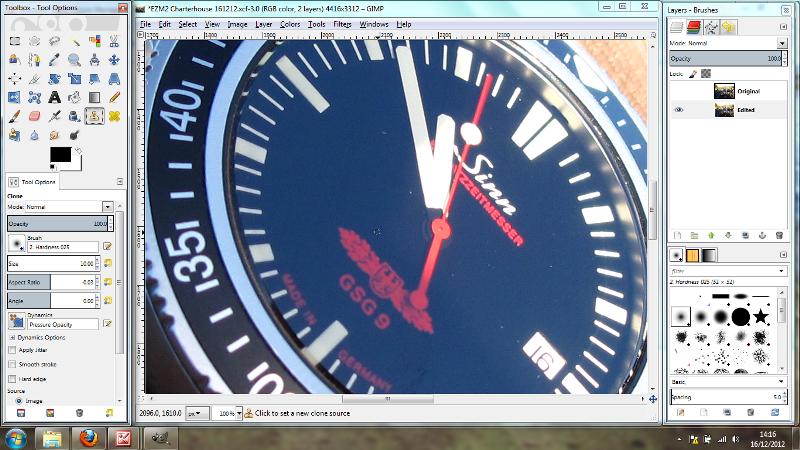
I have started creating a duplicate of that layer and renaming the original layer. This is useful as a comparison to the original images can be made by leaving this original layer at the top and using the visibility ‘eye’ to turn it on and off for an immediate comparison between the original and altered images. See the layers at the top right:
(With the original image layer, (renamed) at the top and visible indicated by the eye – and the new layer for editing highlighted in grey to show it is the active layer, below.)
Removal of specs / dust etc.
The first thing I wanted to do was remove some dust spots from the watch. This can be done in a couple of ways, but I’ve found the best results are achieved using the ‘Repair’ tool.
The ‘Repair’ tool is found in the ‘Tool box’ in the dialogue bar to the left of the screen. The icon is a pair of crossed plasters.
In the screen capture below I have zoomed in on the dial and am about to select the repair tool. See the spots of dust on the dial…
To zoom in and out and pan around the image there are a few options, for me the easiest way is use the central mouse wheel. On its own the wheel will pan the image vertically, (up and down), holding CTRL and using the wheel will zoom in and out, centered on the pointer. Holding shift and using the wheel pans the image horizontally, (left and right) and pushing down on the wheel allows free panning whilst the wheel is held down.
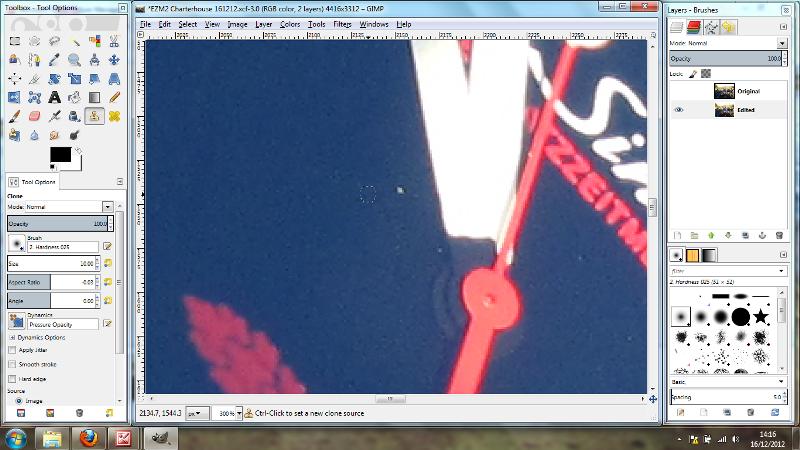
To use the repair tool, click the icon and choose an appropriate size and shape ‘brush’ from the tool options – make sure the correct layer you want to work on is selected and visible and any layer above it is off. Zoom in to a reasonable size and position the pointer in a ‘clean’ location adjacent to the dust spot. Then hold down CTRL and click on the good area to select it. This will define the colour and appearance of the ‘repair’ so make sure you chose a good area that matches the result you want. In this screen capture I have zoomed in to a dust spot and identified the area adjacent that I will use for the repair:
To effect the repair, move the pointer over the pixles that you wish to change and click the area and around it until the dust spot is removed. You may need to use a little trial and error to get the hang of this, but it can be used on large or small areas, without losing any of the adjacent detail.
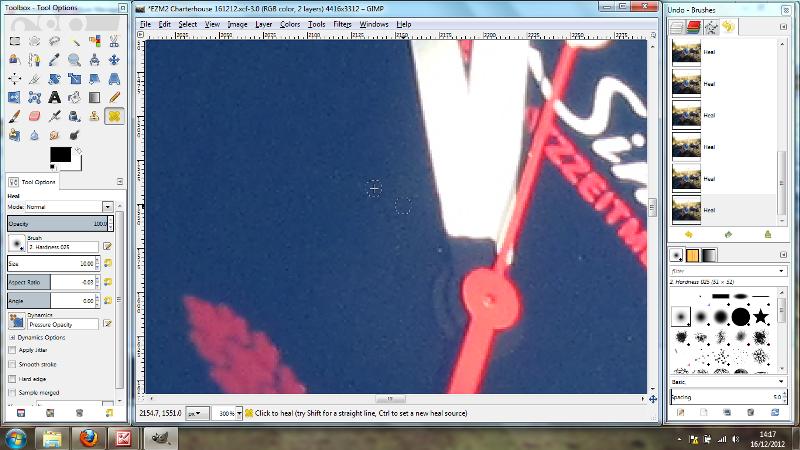
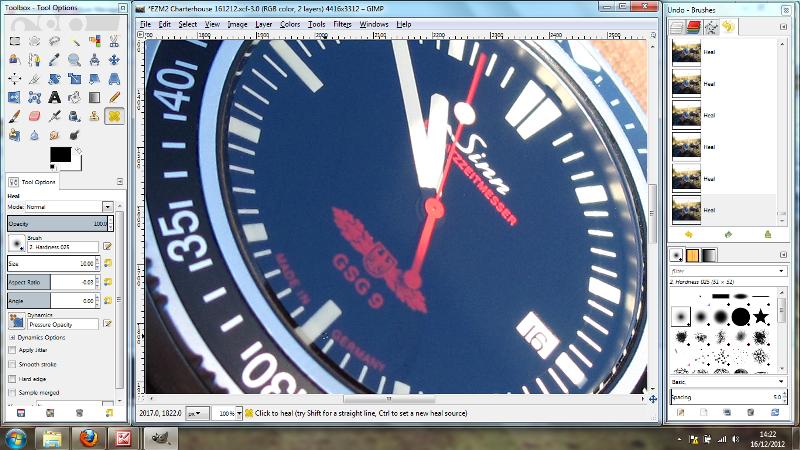
If you find that something hasn’t worked or doesn’t look right, it can be easily ‘undone’. Undo command can be found in the main ‘edit’ menu – or by selecting the ‘undo’ tab at the top right, along from the layers tab – this provides a ‘configurable’ list of actions recently taken in order and can be used to quickly make multiple undo’s to get back to a position you are happy with. See screen shot below where this is open to the right of the image.
In the next screen shot I have removed the dust spot:
Repeat this action to remove all the spots of dust, dirt, smudges etc that you wish - remembering to use CTRL each time to select a clean area to set the basis of the repair applied!
And here is the fully ‘cleaned’ dial:
The next thing I wanted to do was darken the dial, I will explain how this was done in my next blog entry!
Cheers,
Rob